VeraLab SSO Integration with Microsoft Azure SAML
This guide is for VeraLab administrators and the Microsoft Entra ID (Azure) administrators they work with. It shows how to set up SAML single sign-on (SSO) so that users sign in to the VeraLab web application with their Microsoft accounts.
You will register VeraLab as an enterprise application in the Microsoft Entra admin center, exchange SAML metadata between Entra and VeraLab, map the user attributes VeraLab needs and test the sign-in. You need a VeraLab account with the Administrator role, access to the Microsoft Entra admin center, and HTTPS enabled on your VeraLab server.
Create the Enterprise Application in Microsoft Entra
- Log in to the Microsoft Entra admin center and go to Identity → Enterprise applications → Create your own application. Give the application a name, for example VeraLab Test or VeraLab Prod depending on your environment. Keep the default Integrate any other application… option and click Create at the bottom of the panel.
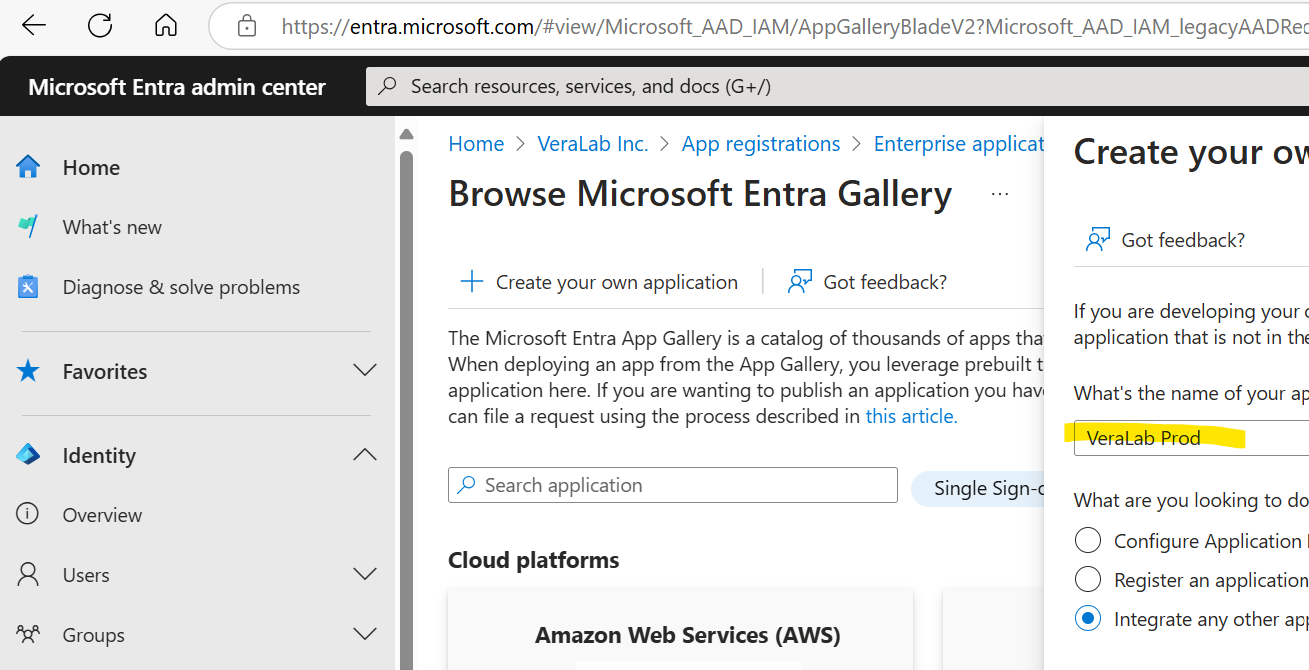
Creating your own application in the Microsoft Entra admin center. - On the application's Overview page, click Get started in the Set up single sign on block.
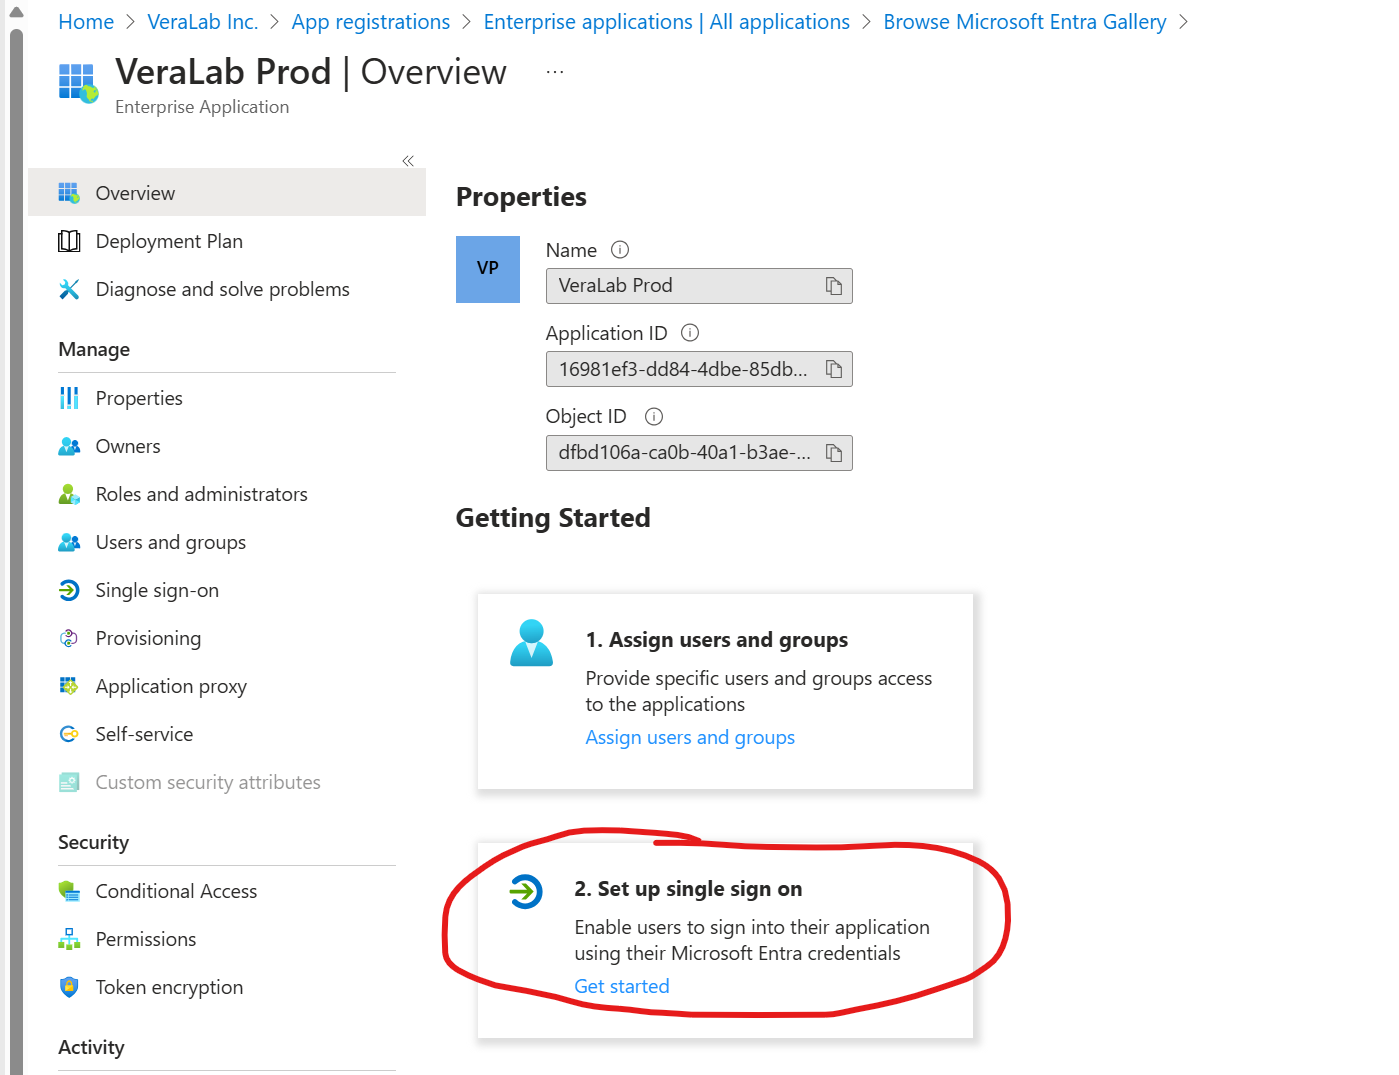
The application Overview page: Set up single sign on. - Under Select a single sign-on method, click the SAML block.
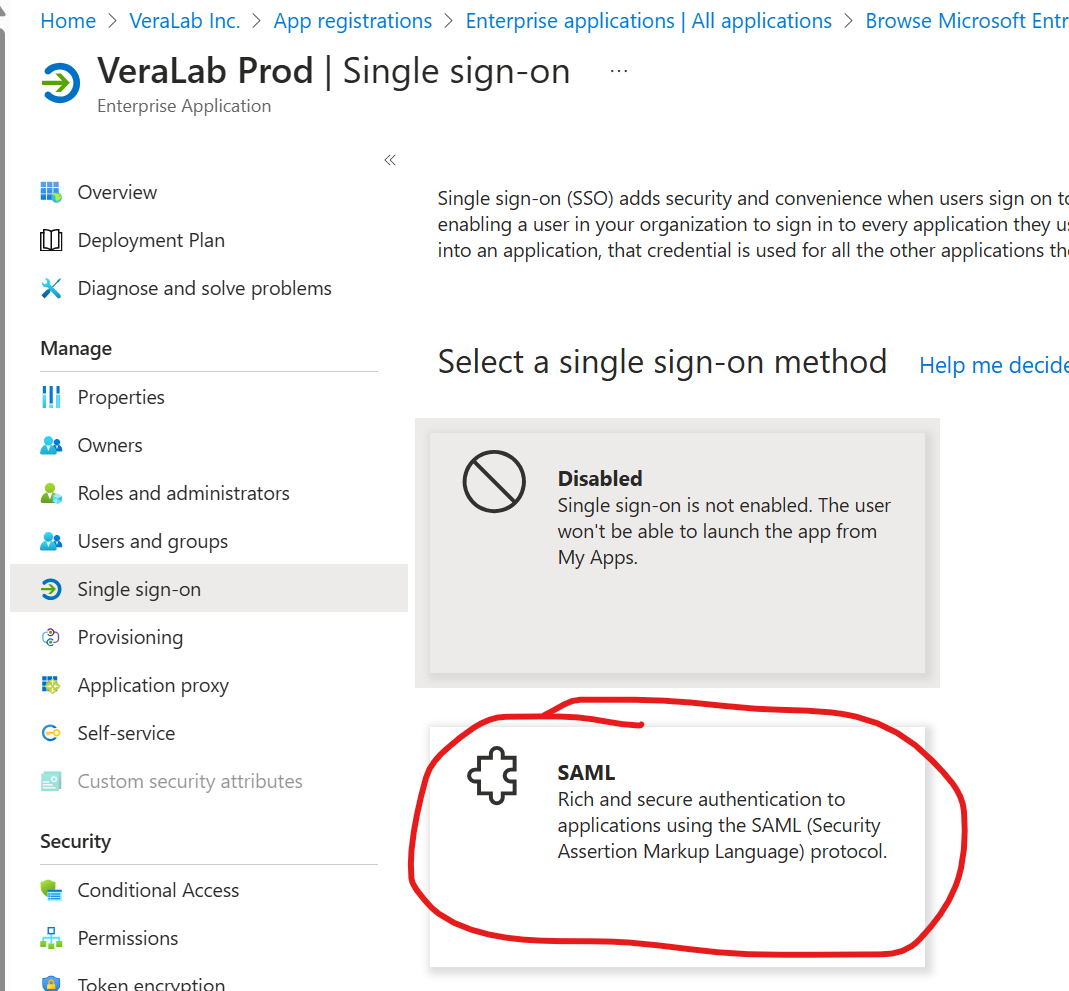
Choosing SAML as the single sign-on method. - On the SAML setup page, find the SAML Certificates section and copy the App Federation Metadata Url. You will paste it into VeraLab in step 8.
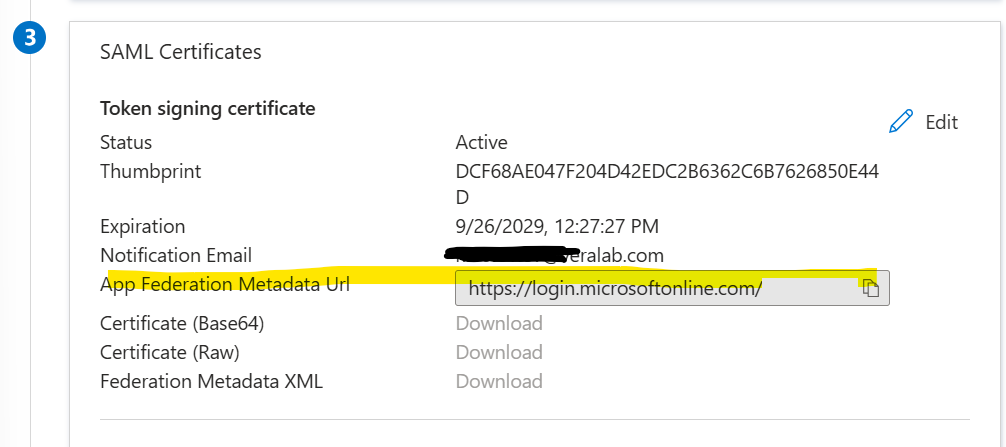
Copy the App Federation Metadata Url from the SAML Certificates section.
Configure SAML in VeraLab
- Log in to the VeraLab web application as a user with the Administrator role. If you have an Enterprise Edition license, change the Department to Site Level.
- Go to Tools → Settings → Single Sign-on Settings. Select the Enable an additional authentication method checkbox and click Save. The Authentication method is SAML.
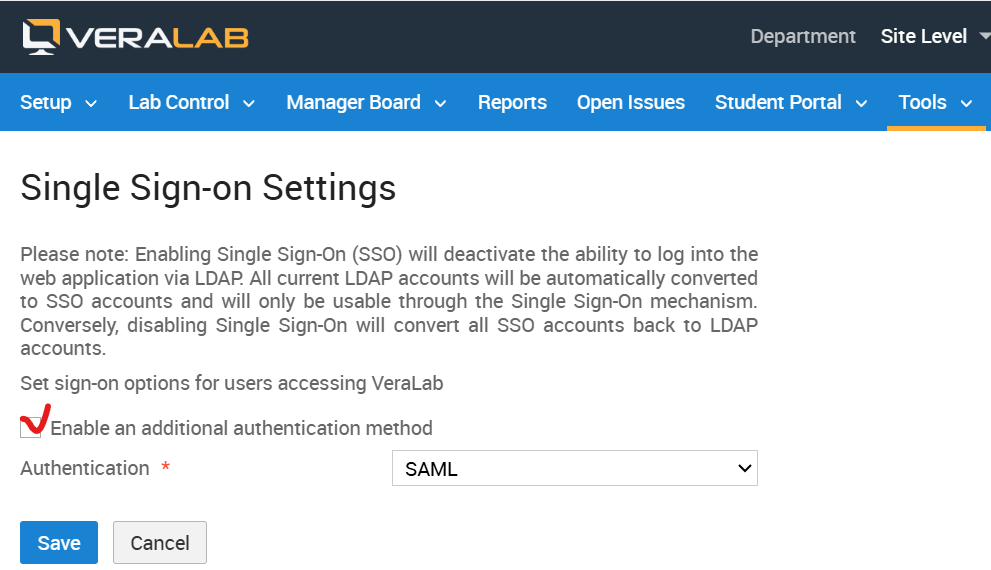
VeraLab Single Sign-on Settings. Please note: enabling single sign-on deactivates logging in to the web application via LDAP. All current LDAP accounts are automatically converted to SSO accounts and can only be used through single sign-on. Disabling single sign-on converts all SSO accounts back to LDAP accounts.
- On the SAML Authentication Settings page, verify that Hostname and Port match your VeraLab application's FQDN and HTTPS port. For example, if you registered VeraLab on your campus DNS server, they may be
veralab.myuniversity.eduand443. Responses from the authentication server are redirected to this address, so HTTPS support must be enabled.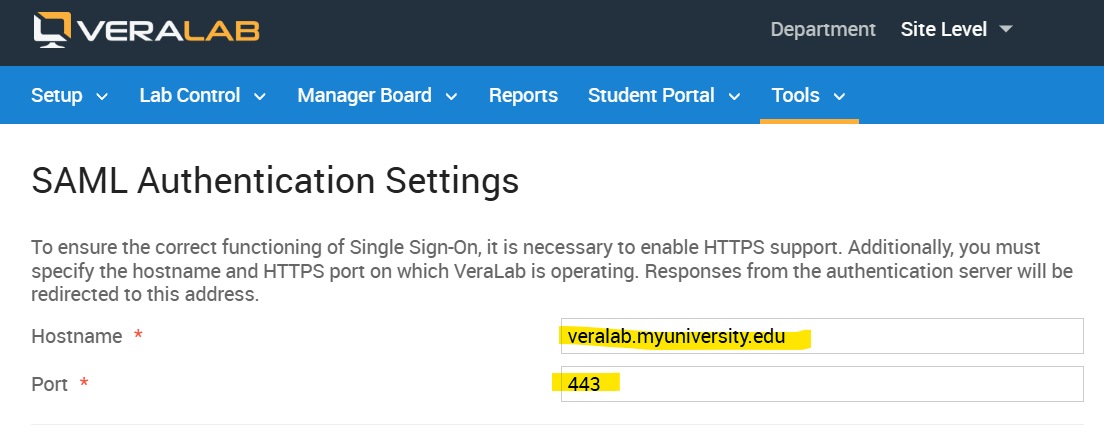
Hostname and port on the SAML Authentication Settings page. - Click Import Settings from IdP Metadata, choose Import from URL and paste the App Federation Metadata Url you copied from Entra in step 4. Click Import.
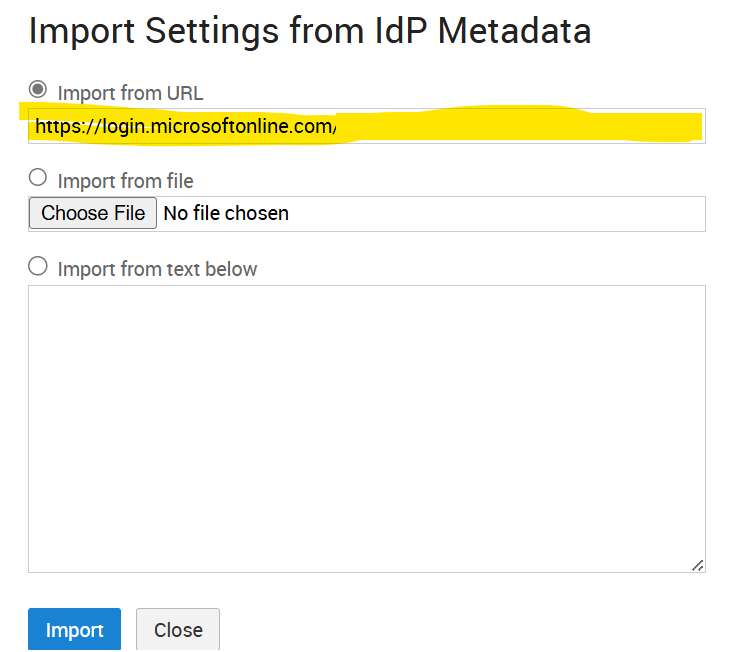
Importing the Entra metadata from its URL. You can also import from a file or pasted text. - Click Save, leaving the other settings at their defaults.
- Back on the Single Sign-on Settings page, under Export metadata from VeraLab SP, click Export metadata and save the VeraLab metadata as an XML file.
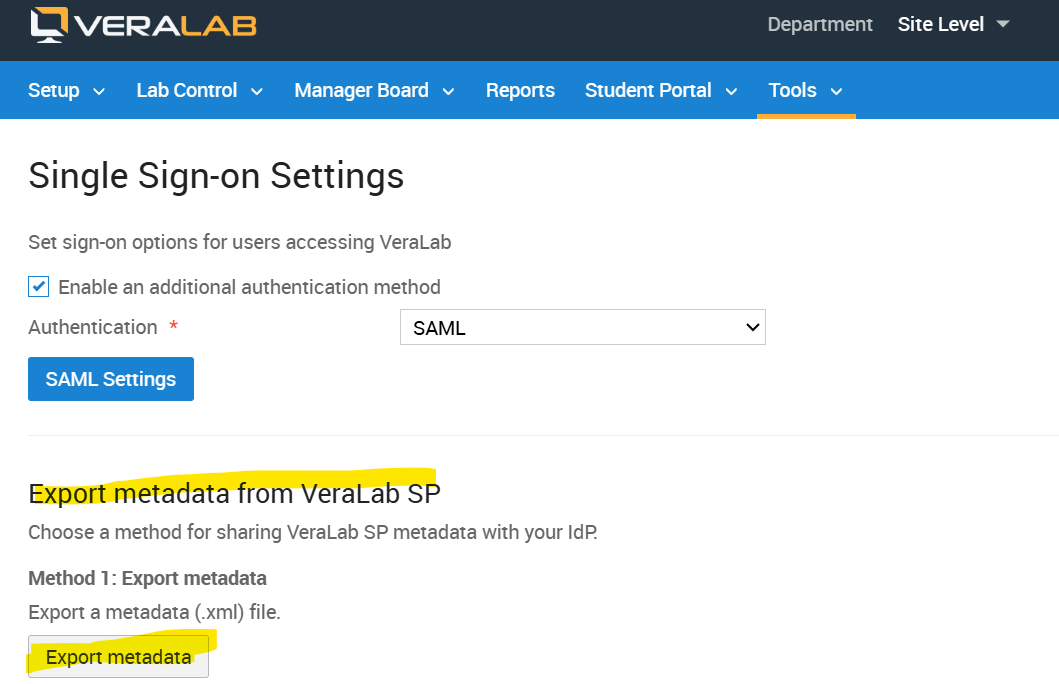
Exporting the VeraLab service provider (SP) metadata as an XML file.
Upload the VeraLab Metadata to Entra
- Go back to the Microsoft Entra admin center. On the application's SAML-based Sign-on page, click Upload metadata file.
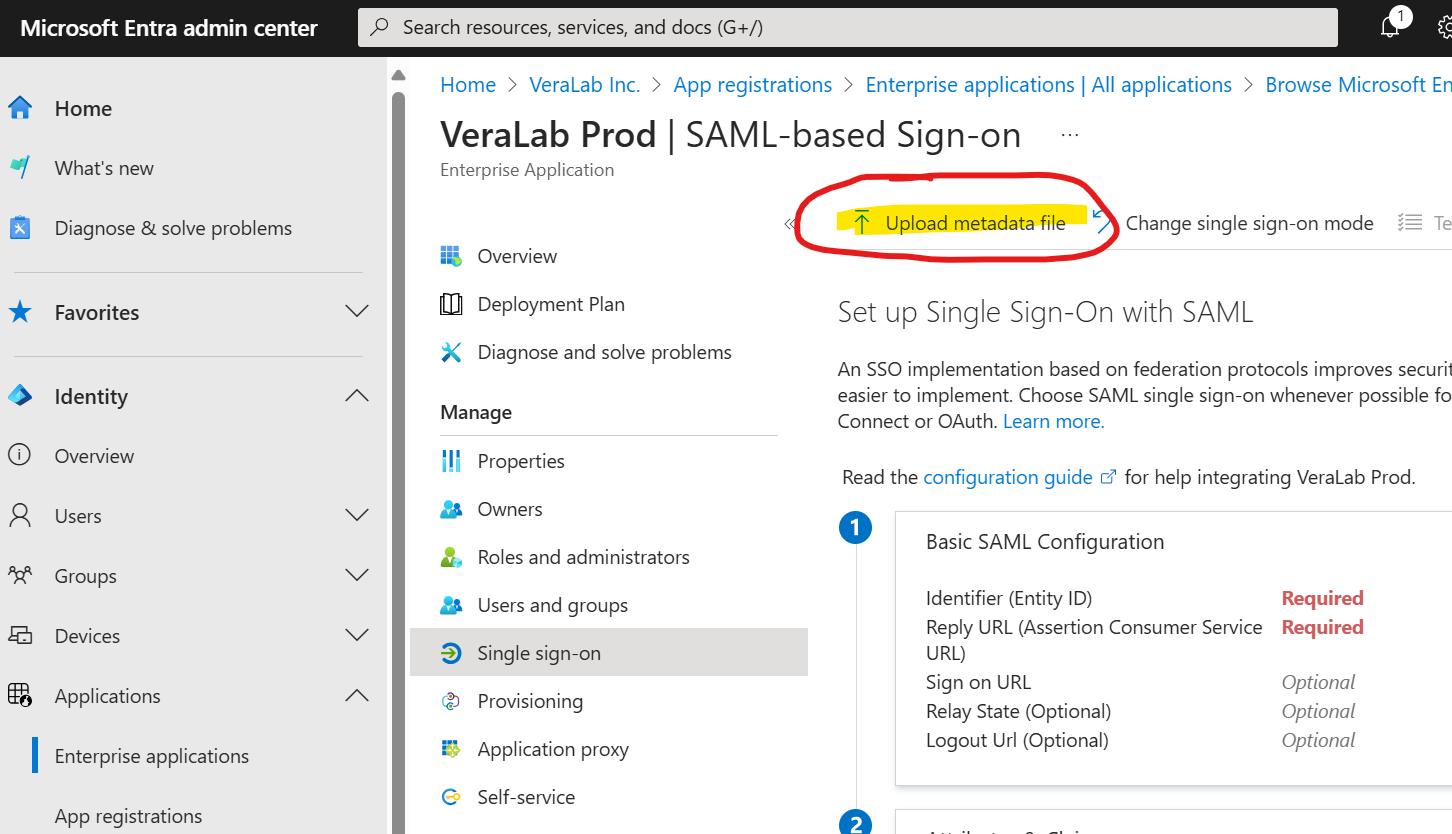
Upload metadata file on the SAML-based Sign-on page. - Select the XML file you saved from VeraLab and click Add.
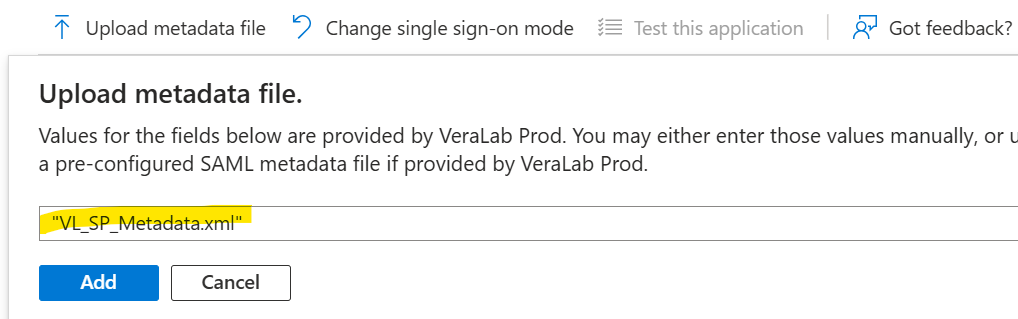
Selecting the VeraLab metadata XML file. - In the Basic SAML Configuration panel that opens, click Save to complete the metadata upload.
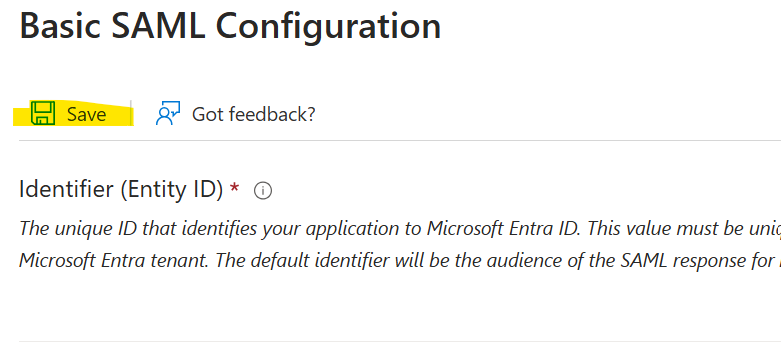
Saving the Basic SAML Configuration. - When Entra asks whether to test single sign-on now, click No, I'll test later.
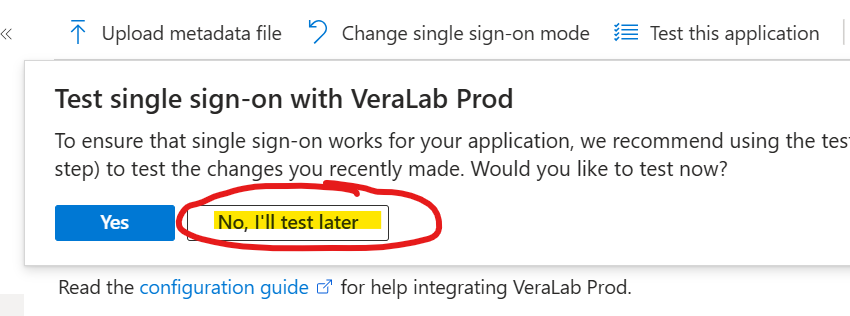
Postpone the test until the remaining settings are done.
Set Assignment and Claims
- Go to the application's Properties screen, set Assignment required? to No and click Save.
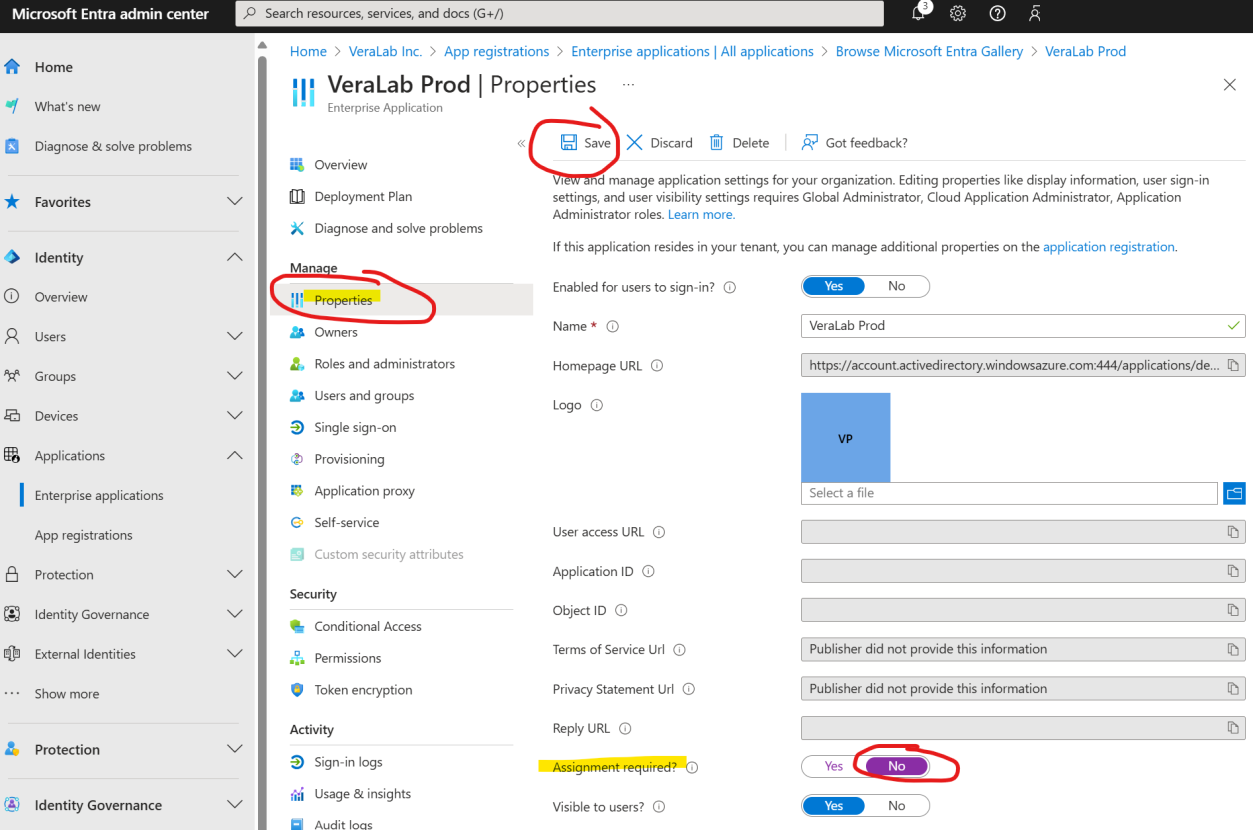
Setting Assignment required to No on the Properties screen. - Go to the Single sign-on screen and edit Attributes & Claims. Delete or edit the existing Additional claims so that only these three mappings remain. The Namespace can be left blank.
Claim name Source attribute emailuser.mailfirst_nameuser.givennamelast_nameuser.surname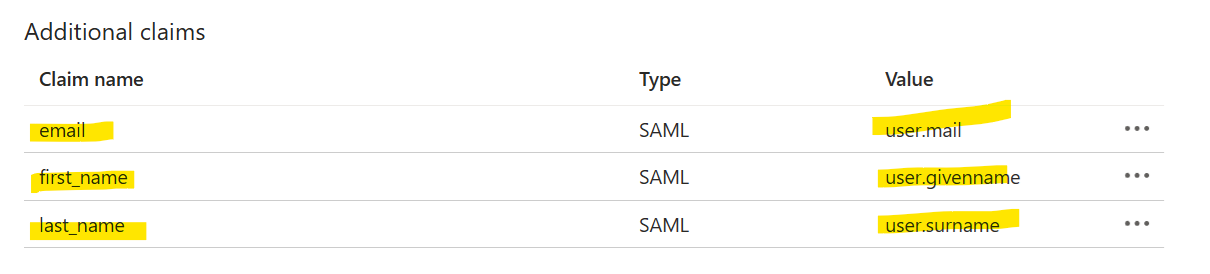
The three additional claims VeraLab uses. 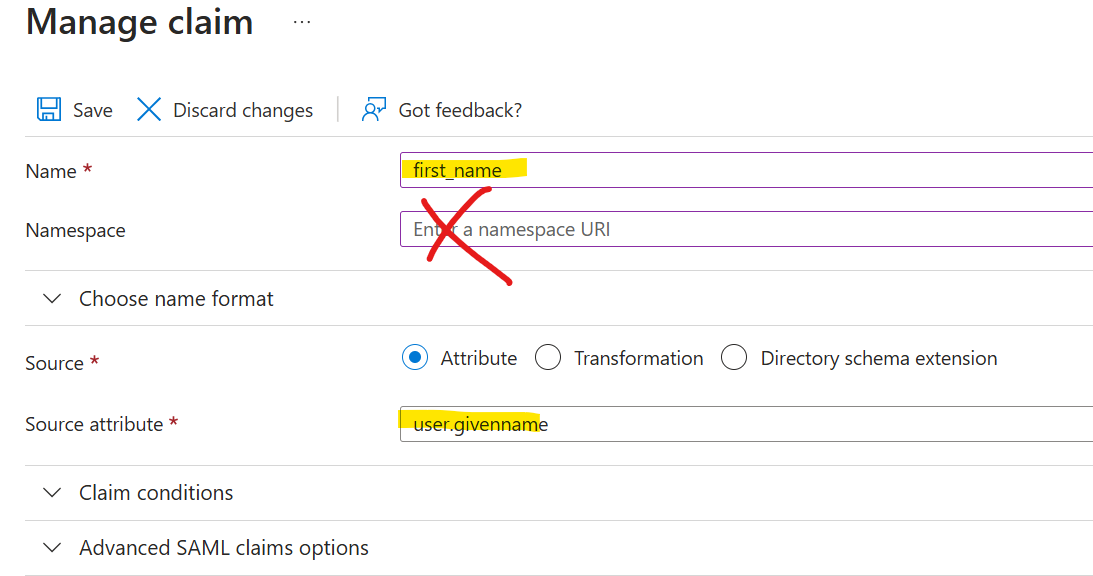
Editing a claim: leave Namespace blank and set the source attribute.
Test Single Sign-On
- Test the SSO integration using the Test this application link on the SAML-based Sign-on page.
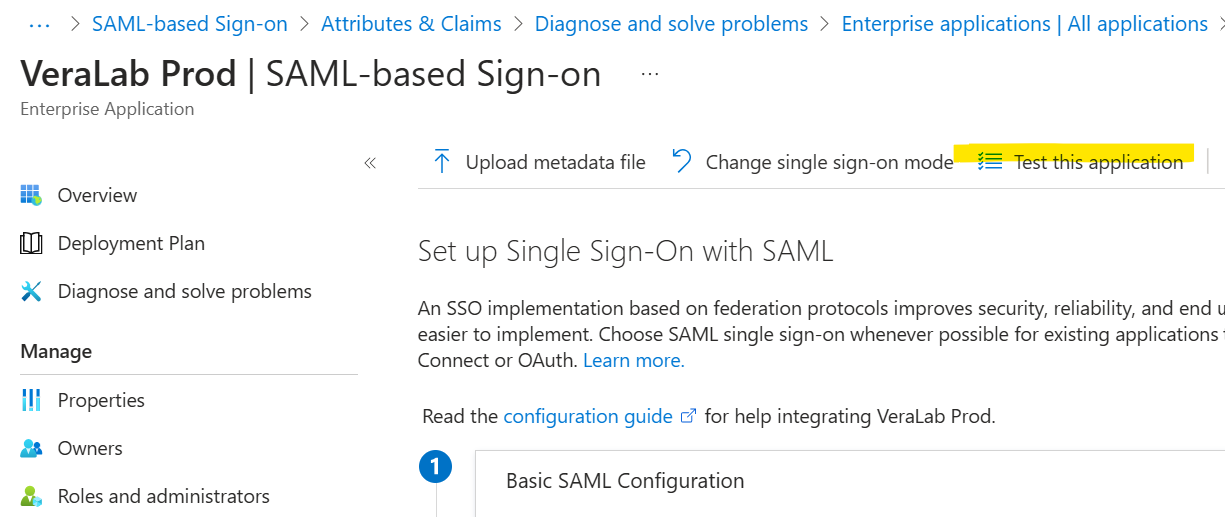
Testing the integration with Test this application.
Related: VeraLab LDAP Configuration Guide, VeraLab LDAP integration overview and the VeraLab FAQ. Questions about your setup? Contact VeraLab Support at support@veralab.com.